
There is a special kind of kitchen stress that comes from a messy pantry. You know you bought the cumin, but you buy it again because you cannot find it. The crackers go stale in a torn box. Cans hide behind other cans until they expire. And every time you open the door, the clutter stares back at you while dinner waits.
A well-organized pantry fixes more than clutter. It saves you real money because you stop buying duplicates. It saves you time because everything has a visible, reachable home. And honestly, it just makes cooking feel calmer. You do not need a giant walk-in or an expensive overhaul to get there, either. Most pantries improve dramatically with a few smart systems: clear containers, simple zones, and the habit of putting things back where they belong.
These 17 pantry organization ideas work for every kind of pantry, from a single narrow cabinet in an apartment to a full walk-in pantry. Pick the ones that fit your space, start with the easiest wins, and build from there. Your future self, standing in front of an open pantry door at 6 p.m., will thank you.
1. Measure Every Shelf Before You Buy a Single Bin
The number one pantry organizing mistake is buying containers before measuring. Pretty baskets that do not fit are just expensive clutter, so grab a tape measure first. Measure the width, depth, and height of every shelf, and write the numbers down or snap a photo of the tape for reference when you shop.
Pay special attention to two things. First, shelf depth: most American pantries have shelves that are 12 or 16 inches deep, and containers that are too deep will stick out while ones that are too shallow waste space. Second, vertical clearance: measure from the shelf surface to the bottom of the shelf above, then subtract an inch or two so you can lift items in and out comfortably. Tall cereal boxes and oil bottles are the usual troublemakers here.
Also note any obstructions: door hinges, shelf brackets, or a shelf that is not quite level. If your shelves are adjustable, decide on your spacing now, before you fill them. A good rule of thumb is shorter gaps (8 to 10 inches) for cans and jars, and taller gaps (12 to 14 inches) for cereal boxes, bottles, and small appliances. Measure twice, buy once, and every container you bring home will slide into place like it was made for your pantry, because it practically was.
2. Decant Dry Goods into Clear Airtight Canisters
Decanting, moving dry goods out of their boxes and bags into uniform clear containers, is the single most transformative pantry organization idea on this list. It looks beautiful, yes, but the practical payoff is bigger: airtight lids keep flour, rice, pasta, cereal, and snacks fresher for months longer than torn cardboard, and clear sides mean you can see exactly what you have and how much is left.
Start with the staples you buy in bulk or use constantly: all-purpose flour, sugar, rice, oats, pasta, and coffee. Choose containers with genuinely airtight seals, silicone gaskets are the detail to look for, and pick one shape family (all square or all rectangular) so they line up neatly without wasted gaps. Round canisters look charming but waste corner space, so save those for countertops.
Always label the contents, and add the expiration date or a “use by” note on the bottom with a small sticker. If your kitchen leans warm and earthy, wooden lids or amber glass can tie the whole pantry to your kitchen style; for inspiration on pulling that warm look together, browse these brown kitchen ideas. Buy your set gradually rather than all at once, starting with five or six canisters for your most-used staples, and add more only after you see the system working.
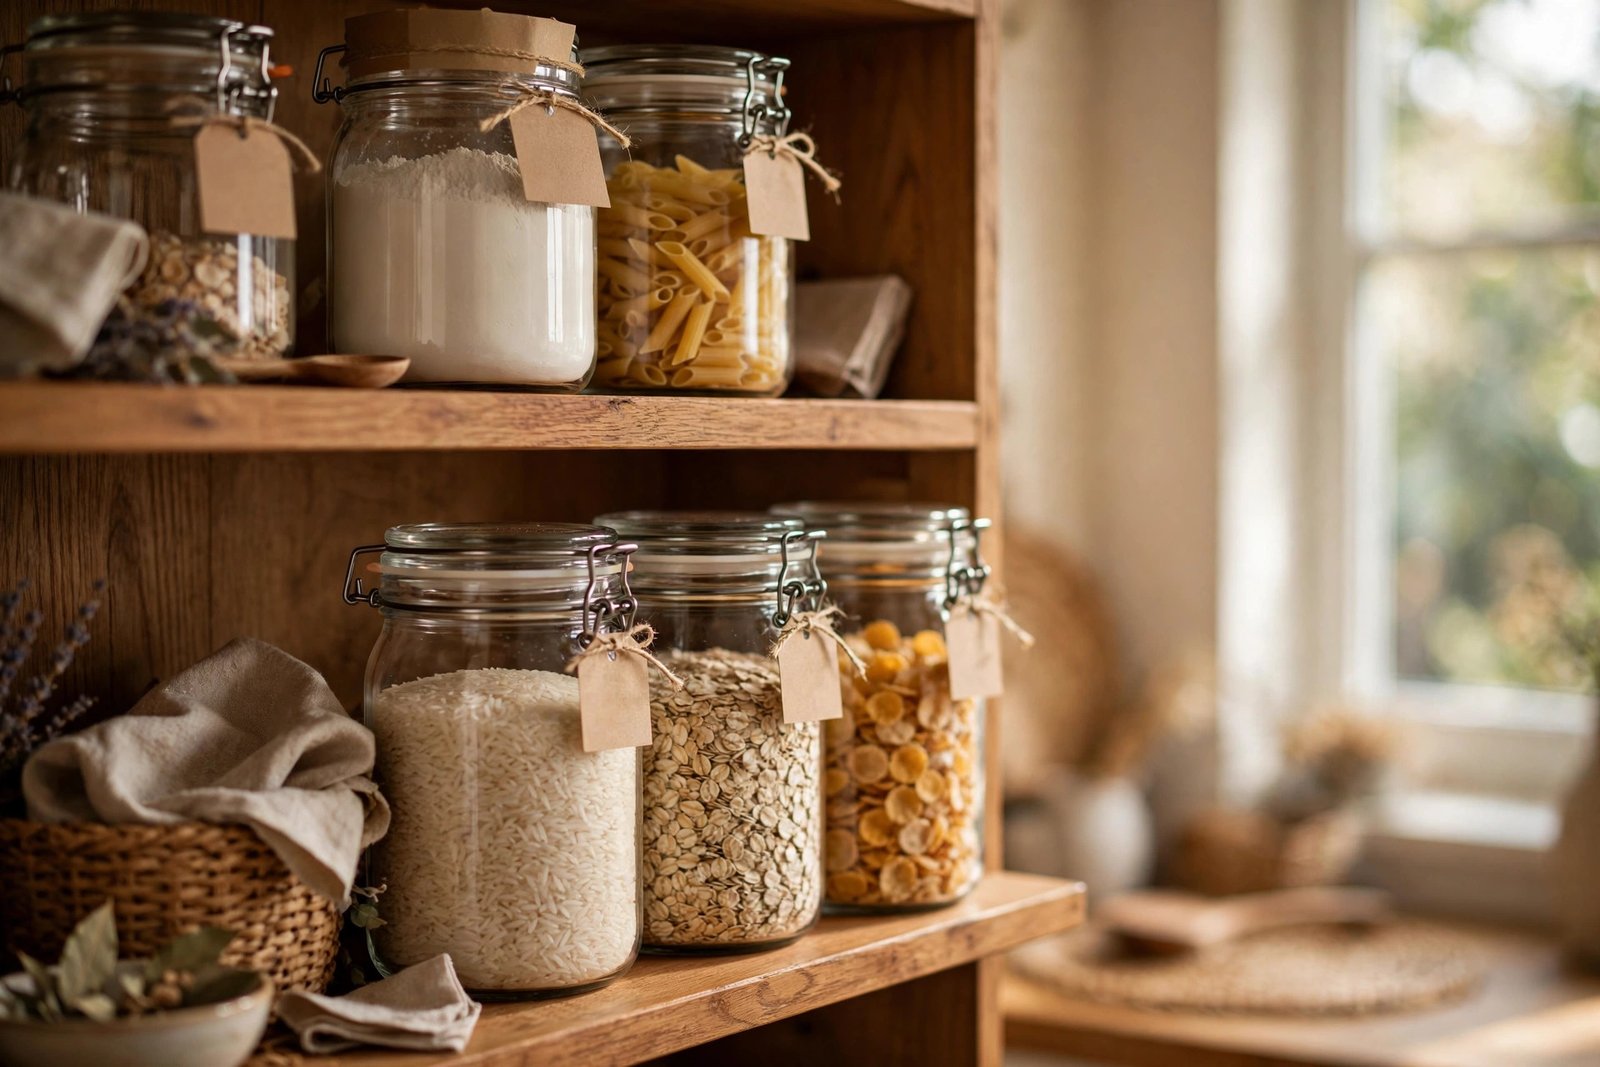
3. Group Like with Like: Build Simple Zones
Grocery stores are organized by category for a reason: it is the fastest way to find things. Steal that logic for your pantry by grouping like items into zones. A baking zone (flour, sugar, baking powder, chocolate chips). A breakfast zone (oats, cereal, honey, peanut butter). A dinner zone (pasta, canned tomatoes, broth, rice). Snacks together. Condiments together. Backstock together.
Zones do two jobs at once. They make cooking faster because everything for a task lives in one spot, and they make restocking obvious because you can see at a glance which zone is running low. If someone in your household has dietary needs, give them their own clearly labeled zone, gluten-free or nut-free, so there is never a mix-up.
Place zones by frequency of use: everyday items at eye level, weekly items on middle shelves, and backstock or rarely used items up high or down low. In a walk-in pantry, you can take this further and treat each wall or shelf bank as its own aisle, which we will come back to in idea 16. The zone system is also the backbone of small pantry organization, because when space is tight, every item needs a logical home or the whole system falls apart within a week.
4. Label Everything, Even the Obvious Stuff
You might think you will remember which canister holds the flour and which holds the powdered sugar. You will not, especially at 7 a.m. or when someone else is cooking. Labels are the glue that holds every other pantry organization idea together, and they are what makes the system survive contact with the rest of your household.
A simple label maker is the classic choice and worth the small investment, but chalkboard labels, kraft paper tags, or even neat handwriting on painter’s tape all work. Label the front of every bin, basket, and canister with what goes inside. For decanted goods, add the expiration date. For zones, label the shelf edge itself so everyone knows the baking supplies live here and the snacks live there.
Keep labels honest and specific: “Pasta” beats “Carbs,” and “Kids’ Snacks” beats “Snacks” when you are trying to keep little hands out of the good cheese crackers. Clear-front storage with clean labels is also very much on-trend right now; you can see how it fits into the bigger picture in these kitchen trends for 2027. Revisit labels every few months and update anything that has drifted, because a label that lies is worse than no label at all.
5. Add Tiered Shelf Risers for Cans and Jars
Cans are the great disappearing act of the pantry: you line them up, and the back row vanishes. Tiered shelf risers, those stepped platforms that lift the back rows, solve this completely. With each row raised a couple of inches above the one in front, you can see every single can at a glance.
Look for risers about 10 to 12 inches deep so they sit fully on standard pantry shelves without tipping. Arrange cans by category, soups with soups, beans with beans, tomatoes with tomatoes, and face all the labels forward like a little grocery shelf. Put the items expiring soonest at the front of each row, and slide new purchases to the back, a simple first-in, first-out rotation that quietly prevents food waste.
Risers work just as well for jars, small bottles of sauces, and even spice jars on a deep shelf. If your shelf is very deep, two risers side by side can create a wide stepped display. And do not overlook the space risers create underneath: the gap beneath a tall riser is perfect for laying flat packets or sliding in a low tray of seasoning envelopes. One small fix, zero tools required, and the most frustrating shelf in your pantry becomes the most satisfying.
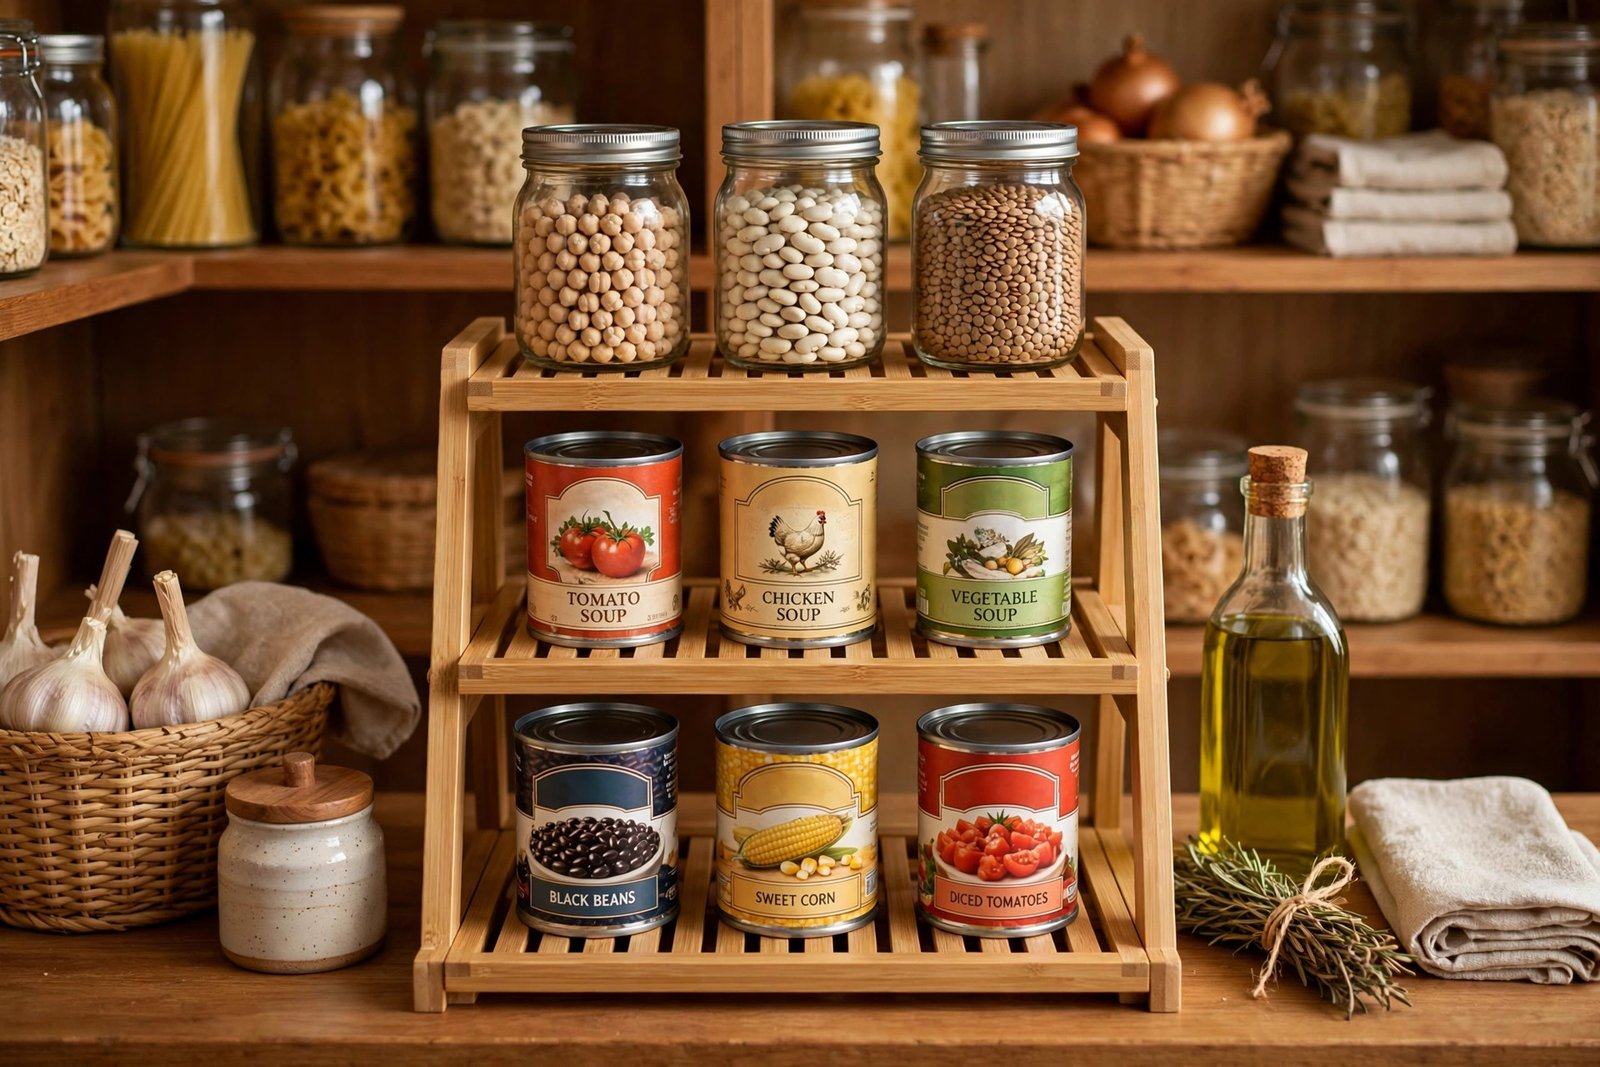
6. Put Turntables to Work in Corners and Deep Shelves
Deep shelves and blind corners are where pantry items go to be forgotten. A turntable, the humble lazy Susan, turns that dead space into the most accessible spot in the pantry. One spin brings the back row to the front, which means no more lost bottles of soy sauce or that third jar of mustard.
Use 10- to 15-inch turntables for oils, vinegars, condiments, and sauces, the tall, tippy things that are annoying to reach past. For shelves with enough height, a two-tier turntable doubles the storage without doubling the footprint. Put one on a lower shelf for heavy items like cooking oils and another at eye level for the everyday condiments your family grabs constantly.
Choose turntables with a raised rim so bottles do not slide off mid-spin, and non-slip bases so the whole thing does not wander. This is also a genuinely useful small pantry organization trick: in a shallow cabinet where you cannot fit bins side by side, a single turntable can hold a whole category, like all your baking extracts or all your hot sauces, in one spinnable spot. Wipe the base monthly, because sticky drips love to collect there.
7. Install Pull-Out Baskets or Sliding Drawers
If your pantry has deep shelves or deep base cabinets, you already know the pain: items migrate to the back and die there. Pull-out baskets and sliding drawer inserts convert that depth into accessible storage. Instead of kneeling and reaching, you pull the whole shelf toward you and see everything.
Wire or mesh pull-out baskets are the easiest retrofit because many simply sit on the existing shelf, no drilling required. Measure your shelf width and depth carefully and leave an inch of clearance on each side so the basket glides without scraping. Use them for heavy or bulky categories: potatoes and onions, small appliances, bulk bags of rice, or the backup supply of canned goods.
For a more built-in feel, sliding two-tier drawers that mount under an existing shelf create a whole extra layer of storage in tall spaces. Whatever style you choose, assign each pull-out a single category and label the front. The golden rule of deep storage is that nothing goes behind anything else without a way to bring it forward, and pull-outs are that way. They are one of the highest-impact pantry storage ideas for older kitchens with deep, dark shelves.
8. Think Vertical in a Small Pantry
Small pantry organization is all about using height, because you cannot use width you do not have. When floor space is limited to a single cabinet or a narrow closet, stack upward: stackable bins, shelf risers, and under-shelf baskets can easily double or triple your usable storage without changing the footprint at all.
Stackable clear bins are the workhorse here. They let you build stable towers of snacks, packets, or produce while still seeing what is inside each layer. Under-shelf baskets hook onto an existing shelf and create a bonus layer underneath for lightweight items like wraps, bags, or tea boxes. And do not forget the slim gap between the refrigerator and the wall: a narrow rolling cart, usually 6 to 8 inches wide, turns that dead sliver into a full extra shelf of storage for cans and bottles.
In a truly tiny pantry, decanting matters even more because uniform containers pack tighter than a jumble of boxes. Keep only what you actually use week to week in the small space, and move backstock elsewhere, a hall closet shelf or the top of a kitchen cabinet. A small pantry that holds only current, visible items beats a big pantry full of forgotten boxes every time.
9. Make the Back of the Door Earn Its Keep
The inside of the pantry door is free real estate that most people ignore. An over-the-door rack instantly adds the equivalent of an extra shelf or two, and it is perfect for the slim items that waste space on deep shelves: spice jars, seasoning packets, small bottles, and wraps.
Choose a rack designed for pantry doors, with adjustable baskets so you can customize the heights. Check two measurements before buying: the door’s thickness, so the hooks fit, and the clearance between the door and the shelves, so the rack does not bang every time you close it. Most racks need about 3 to 4 inches of clearance. Stick to lightweight items on the door; heavy cans can strain hinges over time and make the door swing oddly.
Beyond racks, the door can hold a lot more. Adhesive hooks are perfect for hanging measuring cups and spoons, oven mitts, or a small notepad for the grocery list. A magnetic strip or small magnetic containers can hold spice tins. And a clear over-door shoe organizer, yes, really, is one of the cheapest pantry storage ideas out there: its pockets are ideal for packets, bars, and single-serve items. Just keep it tidy, because the door is the first thing you see.
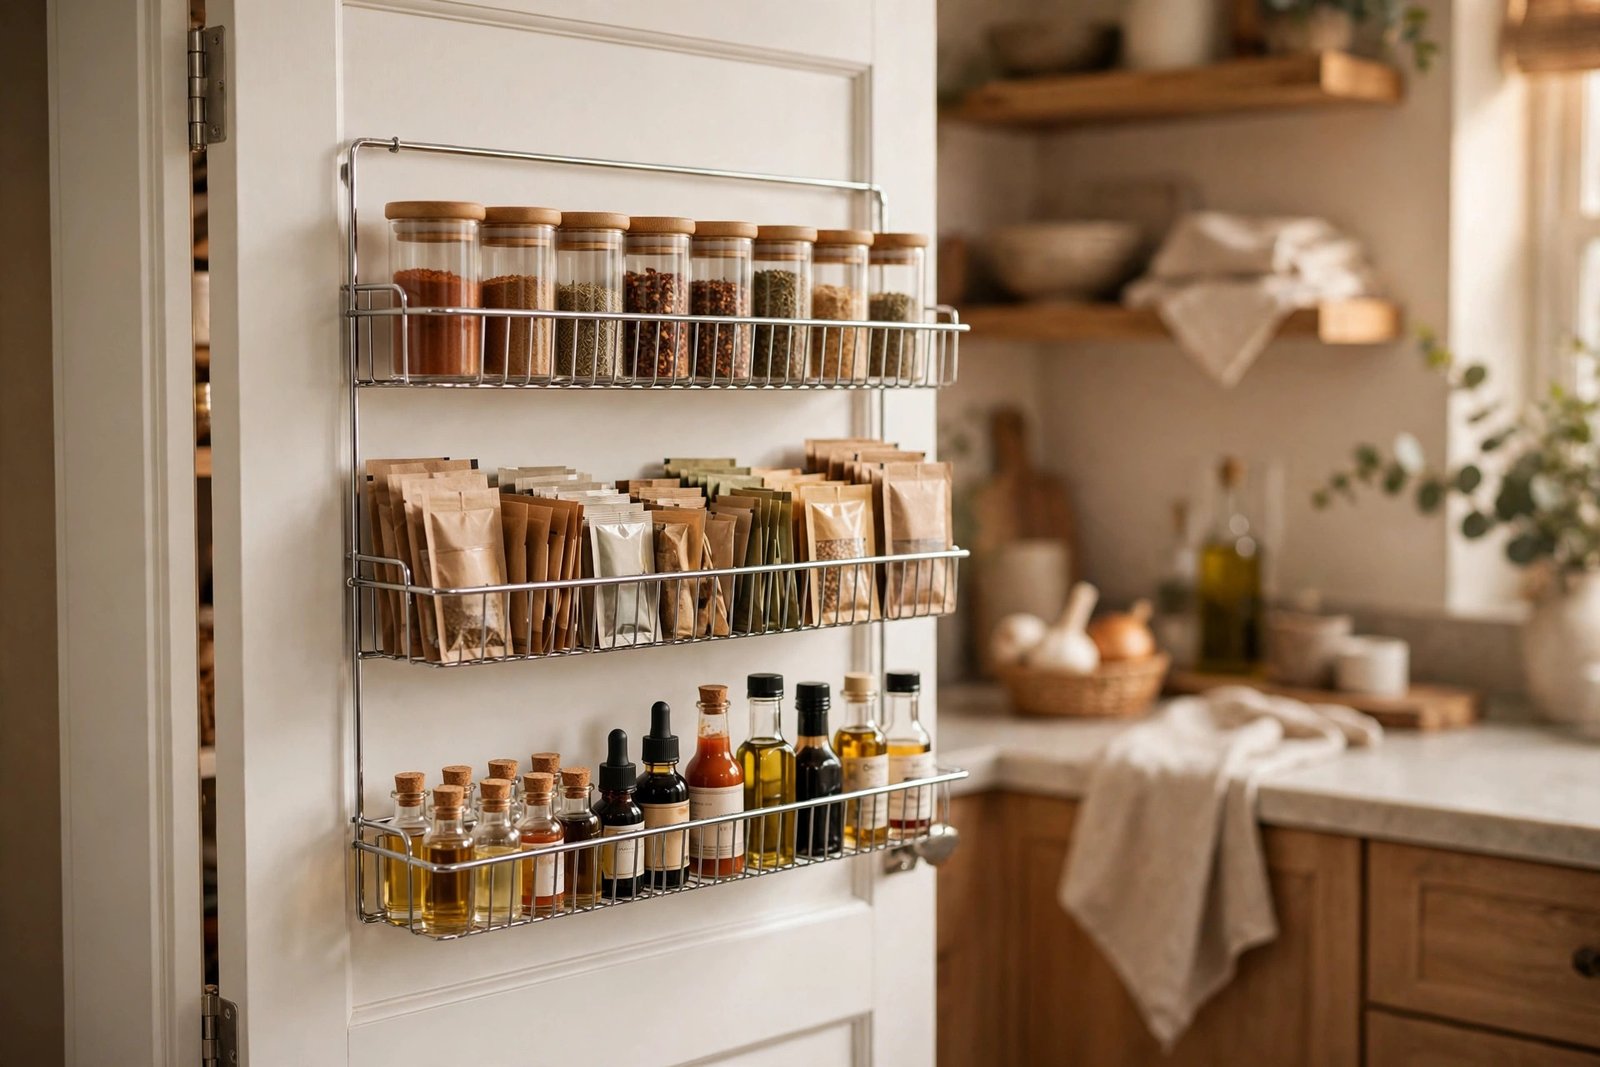
10. Create a Grab-and-Go Snack Zone
If you have kids, or honestly even if you do not, a dedicated snack zone stops the daily pantry ransack. Instead of everyone digging through shelves, all the grab-and-go options live in one clearly labeled spot, low enough for small hands to reach without climbing.
Use one or two clear bins on a low shelf and keep them stocked with pre-portioned options: granola bars, fruit cups, small cracker packs, nuts. Portioning bulk snacks into small reusable bags or containers once a week takes ten minutes and makes the zone self-serve all week. It is also a lifesaver for packing school lunches quickly on busy mornings.
Set one household rule and stick to it: the snack zone is the only place for casual grazing, and when a bin is empty, it gets refilled on grocery day, not raided from elsewhere. For adults, the same concept works as a “lunch prep” bin with tuna packets, soup cups, and crackers. Containing the chaos to one zone keeps the rest of your beautiful pantry organization intact, which is the whole point.
11. Set Up a Dedicated Breakfast Station
Mornings run on routine, so give your routine a home. A breakfast station groups everything the household reaches for before 9 a.m.: coffee or tea, oats or cereal, honey, peanut butter, bread, and whatever your family actually eats. One zone, one shelf, zero morning hunting.
Place the breakfast station near the coffee maker or toaster so the workflow is short. Use matching baskets or bins to corral the smaller items, coffee pods, tea bags, sweetener packets, and keep bread in a dedicated bin or bread box so it does not get crushed. If counter space allows, a small tray on the counter holding the daily coffee and tea supplies keeps the pantry shelf itself less crowded.
This is also where kitchen pantry decor gets to shine. Coordinated baskets in natural materials, pretty labels, and a tidy arrangement turn a functional zone into a little styled moment, especially if your pantry has open shelving or a glass door. For ideas on carrying that polished look into the rest of the kitchen, these modern kitchen decor ideas for USA homes pair beautifully with an organized pantry. A breakfast station that looks good is one the whole family will actually keep tidy.
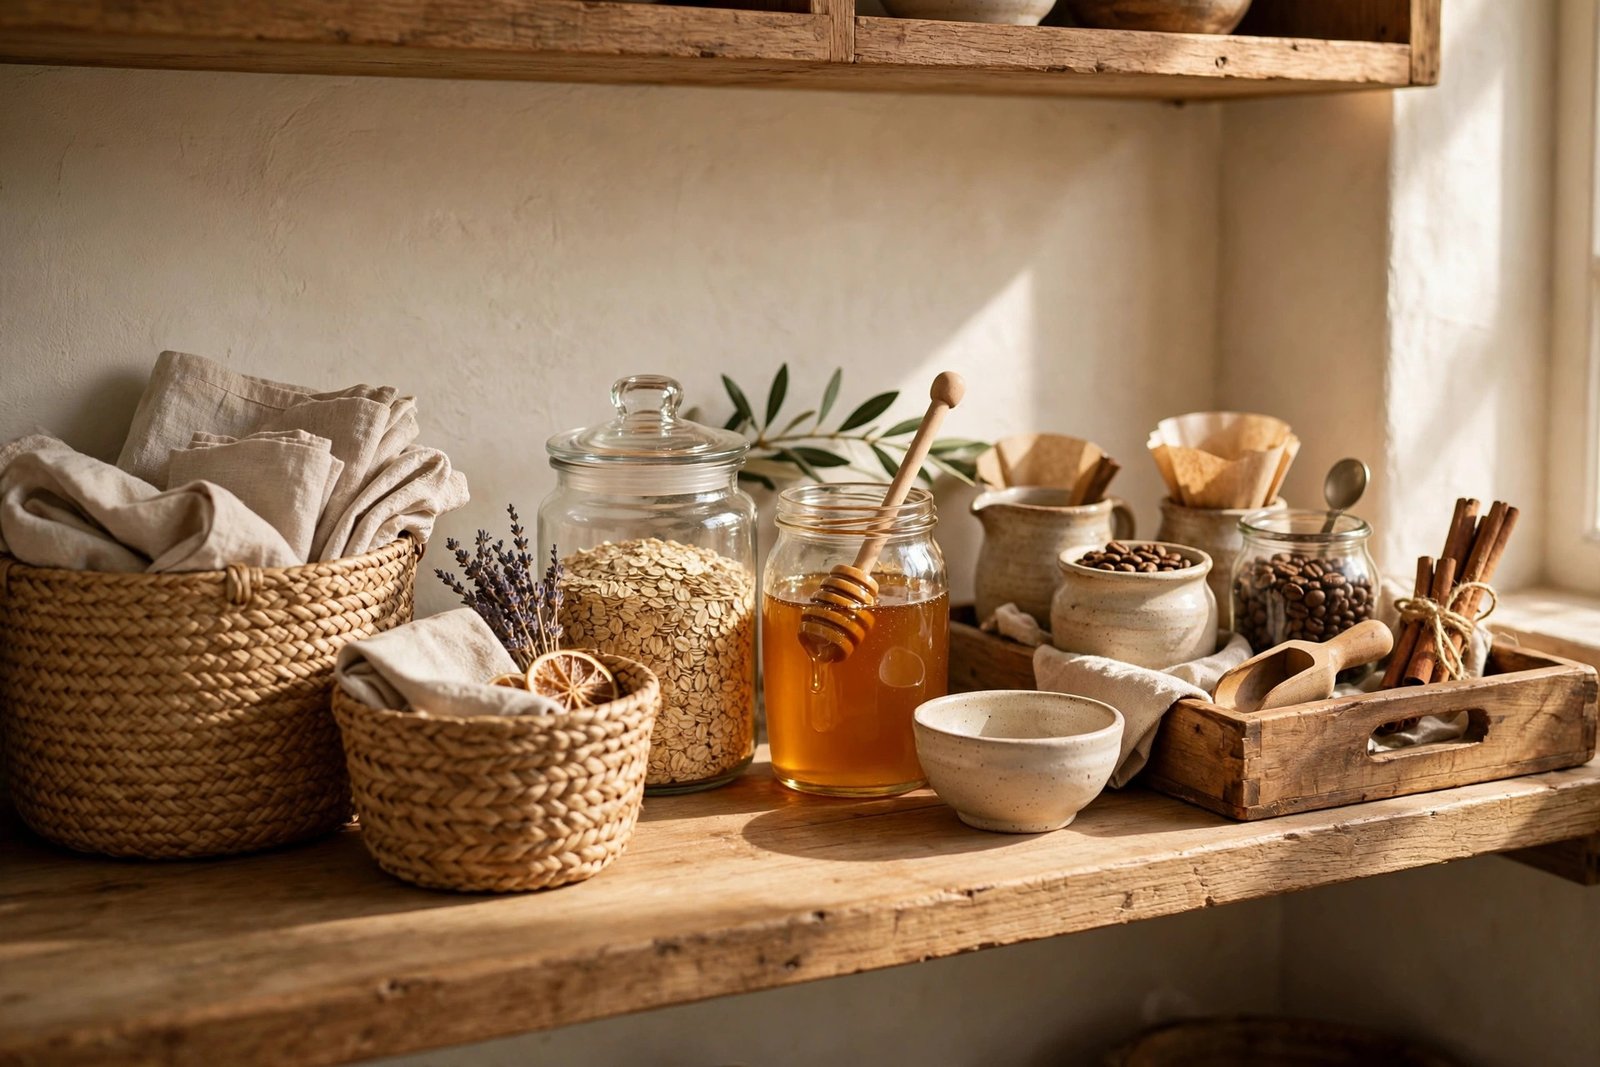
12. Tame Spices with a Drawer or Tiered Rack
Spices are small, numerous, and maddeningly hard to keep organized, which is why they deserve their own system. The goal is simple: see every spice without moving anything else. The two best approaches are a dedicated drawer with a tiered insert or a tiered rack on a shelf, and both beat the classic “spices shoved in a cabinet” chaos.
A shallow drawer with an angled insert is the gold standard if you have a spare drawer near the pantry or stove. Lay jars flat with labels facing up, arranged alphabetically, and you can find anything in two seconds. No spare drawer? A three-tier stepped rack on a pantry shelf does the same job vertically, just keep it near the front so the small jars stay visible.
Decanting spices into uniform small jars with clear labels looks wonderful and makes the quantities visible, but only do it if you will actually keep it up. Either way, check dates once a year: ground spices lose their punch after about a year, whole spices last two to three. When you cook, pull the whole rack or tray out, use what you need, and slide it back. Spices you can see are spices you will actually use, which makes every meal a little better.
13. Corral Packets, Pouches, and Single-Serve Items
Seasoning packets, tea bags, sauce pouches, gelatin envelopes, instant oatmeal: the small stuff multiplies fast and turns any shelf into confetti. The fix is corralling them into small, open-top bins, one category per bin, so the little things behave like big things.
Small acrylic or woven bins about 4 to 6 inches wide are ideal. Stand pouches upright like files in a filing cabinet rather than stacking them flat; you will see every flavor at a glance and grab one without disturbing the rest. Dedicate bins to the categories you actually buy: taco seasoning and gravy mixes, tea and hot chocolate, snack bars, drink mixes.
Use chip clips or small binder clips to reseal opened packets so nothing spills or goes stale. Toss the whole bin’s contents onto the counter once a month, wipe the bin, and check dates, because packets expire quietly. This one tiny system eliminates an outsized share of pantry visual clutter, and it takes about fifteen minutes to set up. Few pantry organization ideas deliver this much calm per minute of effort.
14. Keep a “Use It First” Shelf
Every household wastes food, and the pantry is where a lot of it happens: the half-used bag of specialty flour, the cans bought for a recipe you never made, the crackers approaching their date. A “Use It First” shelf, placed right at eye level, turns those stragglers into this week’s meals instead of next month’s trash.
The system is simple. When you spot something nearing its date or a leftover ingredient from a finished project, move it to the Use It First shelf. When you meal plan or stare into the pantry wondering what to cook, start there. Build dinners around those items first: a “clean out the pantry” pasta night, a soup made from the lingering cans, a baking project for the half-bag of flour.
Keep the shelf small, one basket or one short shelf section, so it never becomes a second junk zone. Tape a small running grocery list to the inside of the pantry door and add items as they run out, which closes the loop between using things up and replacing them. Households that run this system consistently report noticeably less food waste, and the savings show up on the grocery bill within a month or two.
15. Light It Up So Nothing Hides in the Dark
You cannot organize what you cannot see. Pantries are often the darkest corner of the kitchen, especially deep closets and walk-ins, and poor lighting is why duplicates get bought and expirations get missed. Good lighting is one of the most underrated pantry organization ideas, and it is easier than ever to add.
Battery-powered LED strip lights with motion sensors are the easiest win: stick them under each shelf, and they turn on when the door opens and off when it closes. No wiring, no electrician. Choose a warm white around 2700 to 3000 Kelvin so food looks appetizing rather than clinical. Puck lights work well for single dark spots, like the top shelf or a deep corner.
If you are doing a bigger refresh, consider hardwired under-shelf lighting on a door switch, the kind that turns on automatically like a refrigerator light. It is a small luxury that makes the pantry feel like a proper part of the kitchen. Whatever you choose, test the placement at night before committing: the goal is even light on every shelf surface, with no dark bands where cans can hide.
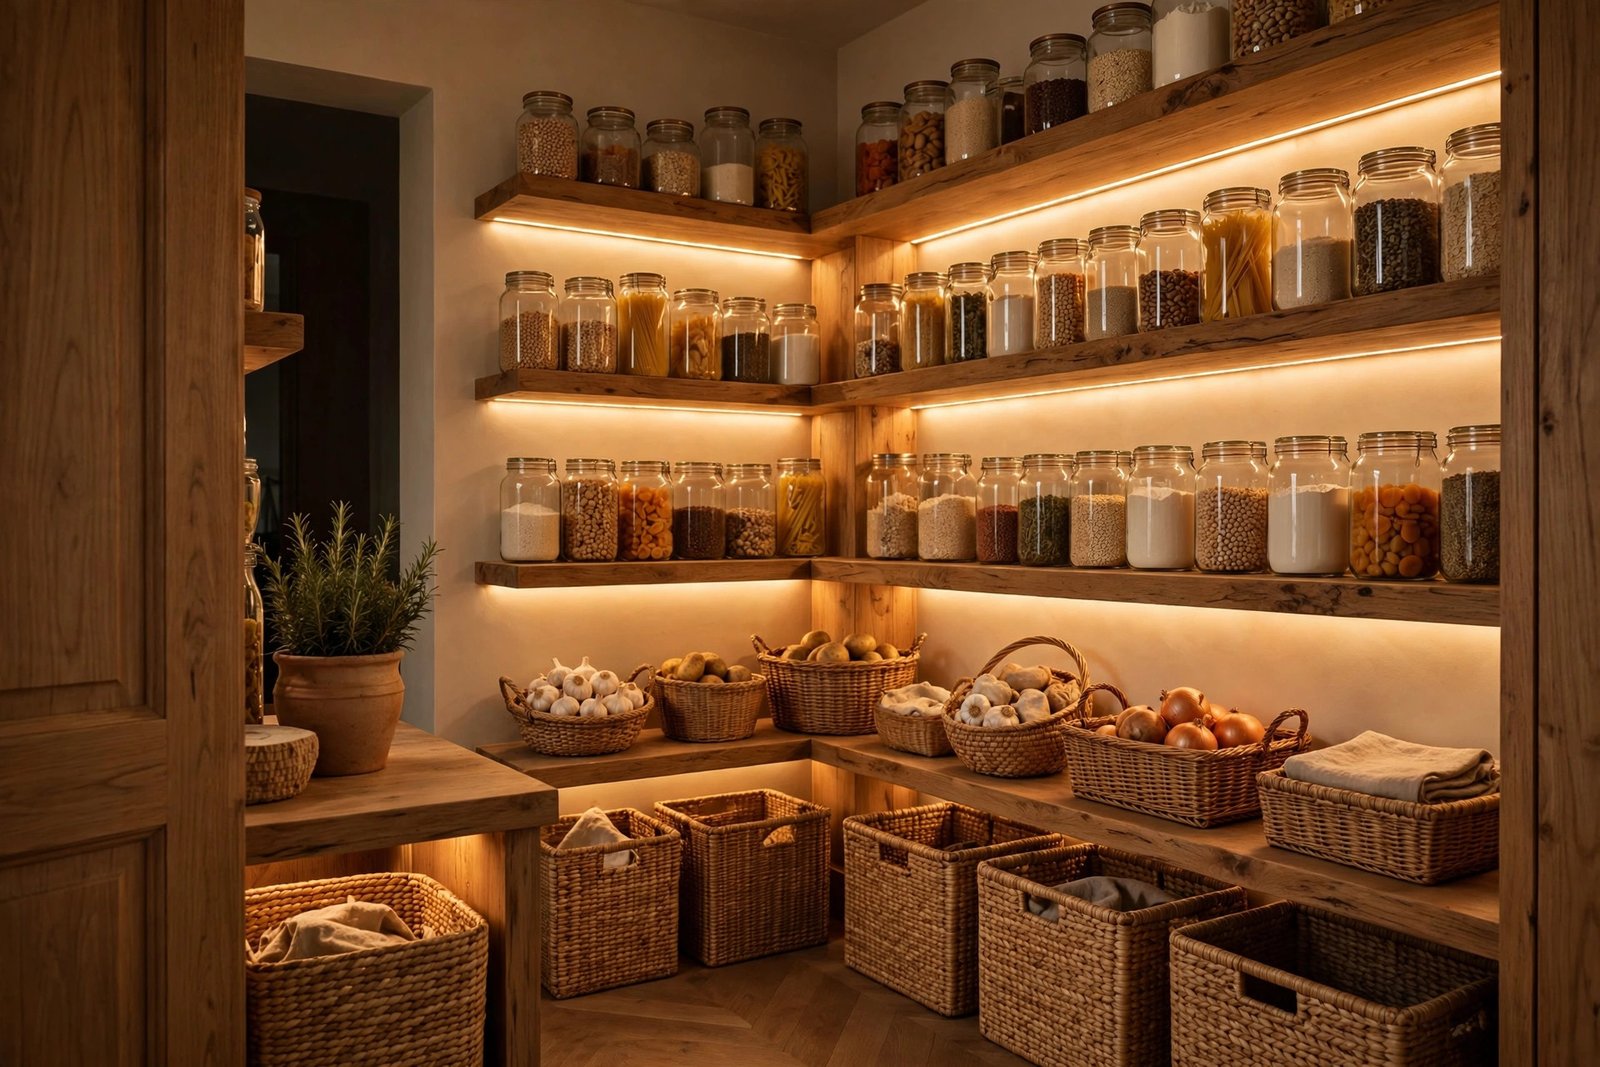
16. Zone a Walk-In Pantry Like a Tiny Grocery Store
A walk-in pantry is a wonderful thing, but without a plan it becomes a small room full of clutter instead of a big pantry full of order. The secret is zoning it deliberately, the way a store lays out aisles, so every category has a defined territory and nothing drifts.
Start with the layout: most walk-ins work best with U-shaped shelving, giving you three walls of storage and floor space in the middle. Assign each wall or section a job. One side for everyday cooking staples at arm’s height. One side for breakfast, snacks, and drinks. The back wall or highest shelves for backstock and bulk buys. Keep the floor clear except for a sturdy step stool, because you will need it for the top shelves.
Within each zone, use the same systems from earlier ideas: clear bins, labels, risers, turntables. Add a small counter or shelf section as a “staging” spot for unloading groceries, which keeps bags from exploding across the kitchen. These walk-in pantry ideas scale down, too: even a reach-in pantry benefits from thinking in zones rather than shelves. The principle is identical whether the pantry is four feet wide or a whole room: everything visible, everything labeled, everything in its zone.
17. Do a 10-Minute Weekly Reset
Here is the truth no organizing article likes to admit: no system stays perfect on its own. The difference between a pantry that stays organized and one that slides back into chaos is a tiny weekly habit. Ten minutes, once a week, ideally right before or after your grocery run.
The reset is simple. Pull anything visibly out of place back to its zone. Toss anything expired or stale. Wipe up any spills or crumbs, because a clean shelf is a shelf you will respect. Check the Use It First shelf and plan one meal around it. Refill the snack zone. That is the whole routine, and it prevents the slow drift that undoes every other idea on this list.
Tie the habit to something you already do, like putting groceries away, so it sticks. And here is a bonus: this same zone-and-reset logic works wonders beyond the kitchen. If your laundry supplies are scattered across three cabinets, these laundry room ideas show how to bring the same order there. Systems beat willpower every time, in the pantry and everywhere else.
Products to Consider
You do not need to buy everything at once. Start with the categories below that match your biggest pain points, and build your system gradually:
- Clear airtight canisters with silicone-seal lids, in one uniform shape
- A simple label maker, or chalkboard labels and a chalk marker
- Tiered shelf risers sized to your shelf depth
- One or two turntables with raised rims for deep shelves
- Stackable clear bins and under-shelf baskets for small pantries
- An over-the-door rack with adjustable baskets
- Small open-top bins for packets and single-serve items
- Battery-powered motion-sensor LED strip lights in warm white
- Woven or fabric baskets in one matching style for open shelves
- A sturdy folding step stool for high shelves
Frequently Asked Questions
How do I organize a very small pantry?
Focus on vertical space and visibility. Use stackable bins, shelf risers, and under-shelf baskets to multiply your shelf area, decant into uniform containers so everything packs tightly, and use the back of the door for slim items. Keep only current, week-to-week items in the small space and store backstock elsewhere. A small pantry with a clear zone for each category stays organized far longer than a larger one without a system.
What containers are best for pantry organization?
Clear, airtight, and uniform. Clear sides let you see contents and quantities at a glance. Airtight seals with silicone gaskets keep dry goods fresh and protect against pests. Uniform shapes, all square or all rectangular, pack together without wasted gaps. For bins and baskets, choose one style and stick with it for a calm, cohesive look, and always label the front.
How do I keep my pantry organized long-term?
Two habits do most of the work: put things back in their labeled zones immediately, and do a 10-minute weekly reset to catch drift, toss expired items, and wipe shelves. Also, practice one-in-one-out for backstock, so new purchases do not overflow the zones. Systems that are simple enough for the whole household to follow are the ones that survive.
Should I decant everything into containers?
No, and trying to will burn you out. Decant the staples you use constantly and buy in bulk: flour, sugar, rice, pasta, oats, cereal, coffee, snacks. Leave rarely used or oddly shaped items in their original packaging, just corralled into labeled bins. Decanting is a tool for visibility and freshness, not a rule. Start with five or six canisters and expand only if the system is working for you.
How do I organize a walk-in pantry versus a reach-in pantry?
The systems are the same, the scale changes. In a walk-in, zone each wall or shelf bank like store aisles, keep the floor clear, and add good lighting since walk-ins are often dark. In a reach-in, prioritize pull-out baskets, turntables, and door storage to defeat depth, and keep everyday items at eye level. Both benefit equally from clear containers, labels, and the weekly reset.
Final Thoughts
An organized pantry is not about perfection or matching containers for their own sake. It is about making your kitchen easier to live in: fewer duplicate purchases, less wasted food, faster weeknight cooking, and the small daily pleasure of opening a door and seeing order instead of chaos.
You do not have to do all 17 ideas this weekend. Start with the tape measure and one clear zone, then add a system each week. Within a month, your pantry will run itself on habits instead of heroic cleanouts. And once you feel how good that is, do not be surprised if you start eyeing the rest of the kitchen, one labeled bin at a time.